Do you have heritage single glazing and want to reduce your heating bills or improve energy efficiency? Are your windows at risk from vandalism? Our Sekosnap® Secondary Glazing system is the perfect solution for you; bringing improved energy efficiency and security all within a reasonable budget!
Ideal for listed buildings, conservation areas and housing the Sekosnap® secondary glazing system can be used on a wide range of public, private and commercial buildings as a solution to save the expense of replacing at-risk windows.
Despite its wide range of qualities, Sekosnap® is easy to install by anyone with just a little DIY experience. As the name suggests, “Sekosnap®” is very intuitive to install and simply ‘snaps’ into place. However, there are a few other steps involved so our Video Team has created a new how-to that will help guide you easily through the whole installation process!
Remember, feel free to get in touch to discuss any specific Sekosnap® queries and our team will be happy to help and discuss!
So, how do you install our full Sekosnap® Secondary Glazing system? To correctly install Sekosnap® simply watch our video and follow the below steps:
Tools Required to install Sekosnap® Secondary Glazing:
- Hacksaw (Top Tip: Fine Tooth is recommended for the smoothest cut)
- Drill
- Measuring Tape
- Pencil or Pen
- Soft Mallet (optional)
- Lubricant (Optional)
How to Install Sekosnap® Secondary Glazing - Steps:
1. Safety First – Always Wear the Correct PPE Equipment
2. Measure the internal size of your window or frame. When doing a mitre joint the internal frame size will equal the inside mitre size. You can increase the size if you wish to have the Sekosnap® frame set back a bit. If using a butt joint method, add 27mm either side to this inside measurement.
3. Accurately mark your SekoSnap® lengths to match your measurements
4. Clamp the Sekosnap® lengths securely in place
5. Using an appropriate metal blade, start with a small number of push strokes to create a cut groove to follow. (Remember: Cut the top and base bars separately)
6. Gradually speed up as you progress into the Sekosnap® Profile. (Top Tip: Applying a little lubricant to the blade can create a smoother cut)
7. Drill any additional holes required in the base bars with a HSS drill bit. Sekosnap® comes pre-drilled at 250mm centres so extra holes are usually only required at the end of lengths to strengthen the installation.
8. Slowly screw in each base bar starting for the bottom, taking care to ensure each screw head is below the clips on the bar. (Top Tip: it can be easier to screw in only one or two screws partway into each base bar initially to give you scope to align the corners before fully securing)
9. Cut your Axgard® Sheet to size and check it fits against the frame. Remember to add 10-12mm to your Axgard® sheet measurement for each Sekosnap® receptor on either side. For full cutting instructions please refer to our How to Cut Axgard® Sheets video.
10. Peel back to Axgard® Protective Film on the front approx. 50mm around the sheet
11. Remove the Axgard® protective film from the back of the sheet completely
12. Snap the Sekosnap® top clips on the Axgard® glazing sheet one by one and gently tap into place to ensure the corners line up and are square as possible.
13. Offer the Axgard® sheet, now enclosed with Sekosnap® Top clips, up to the bottom of the frame and position the bottom top clip on top of the first base bar
14. Then align the top, ensuring the corners square, as slowly snap the Sekosnap® together, starting at the bottom and working up (Top Tip: softly using a rubber mallet can help snap larger panels into place)
15. Finally, remove the Axgard® protective film fully off the front!
Common Sekosnap® questions:
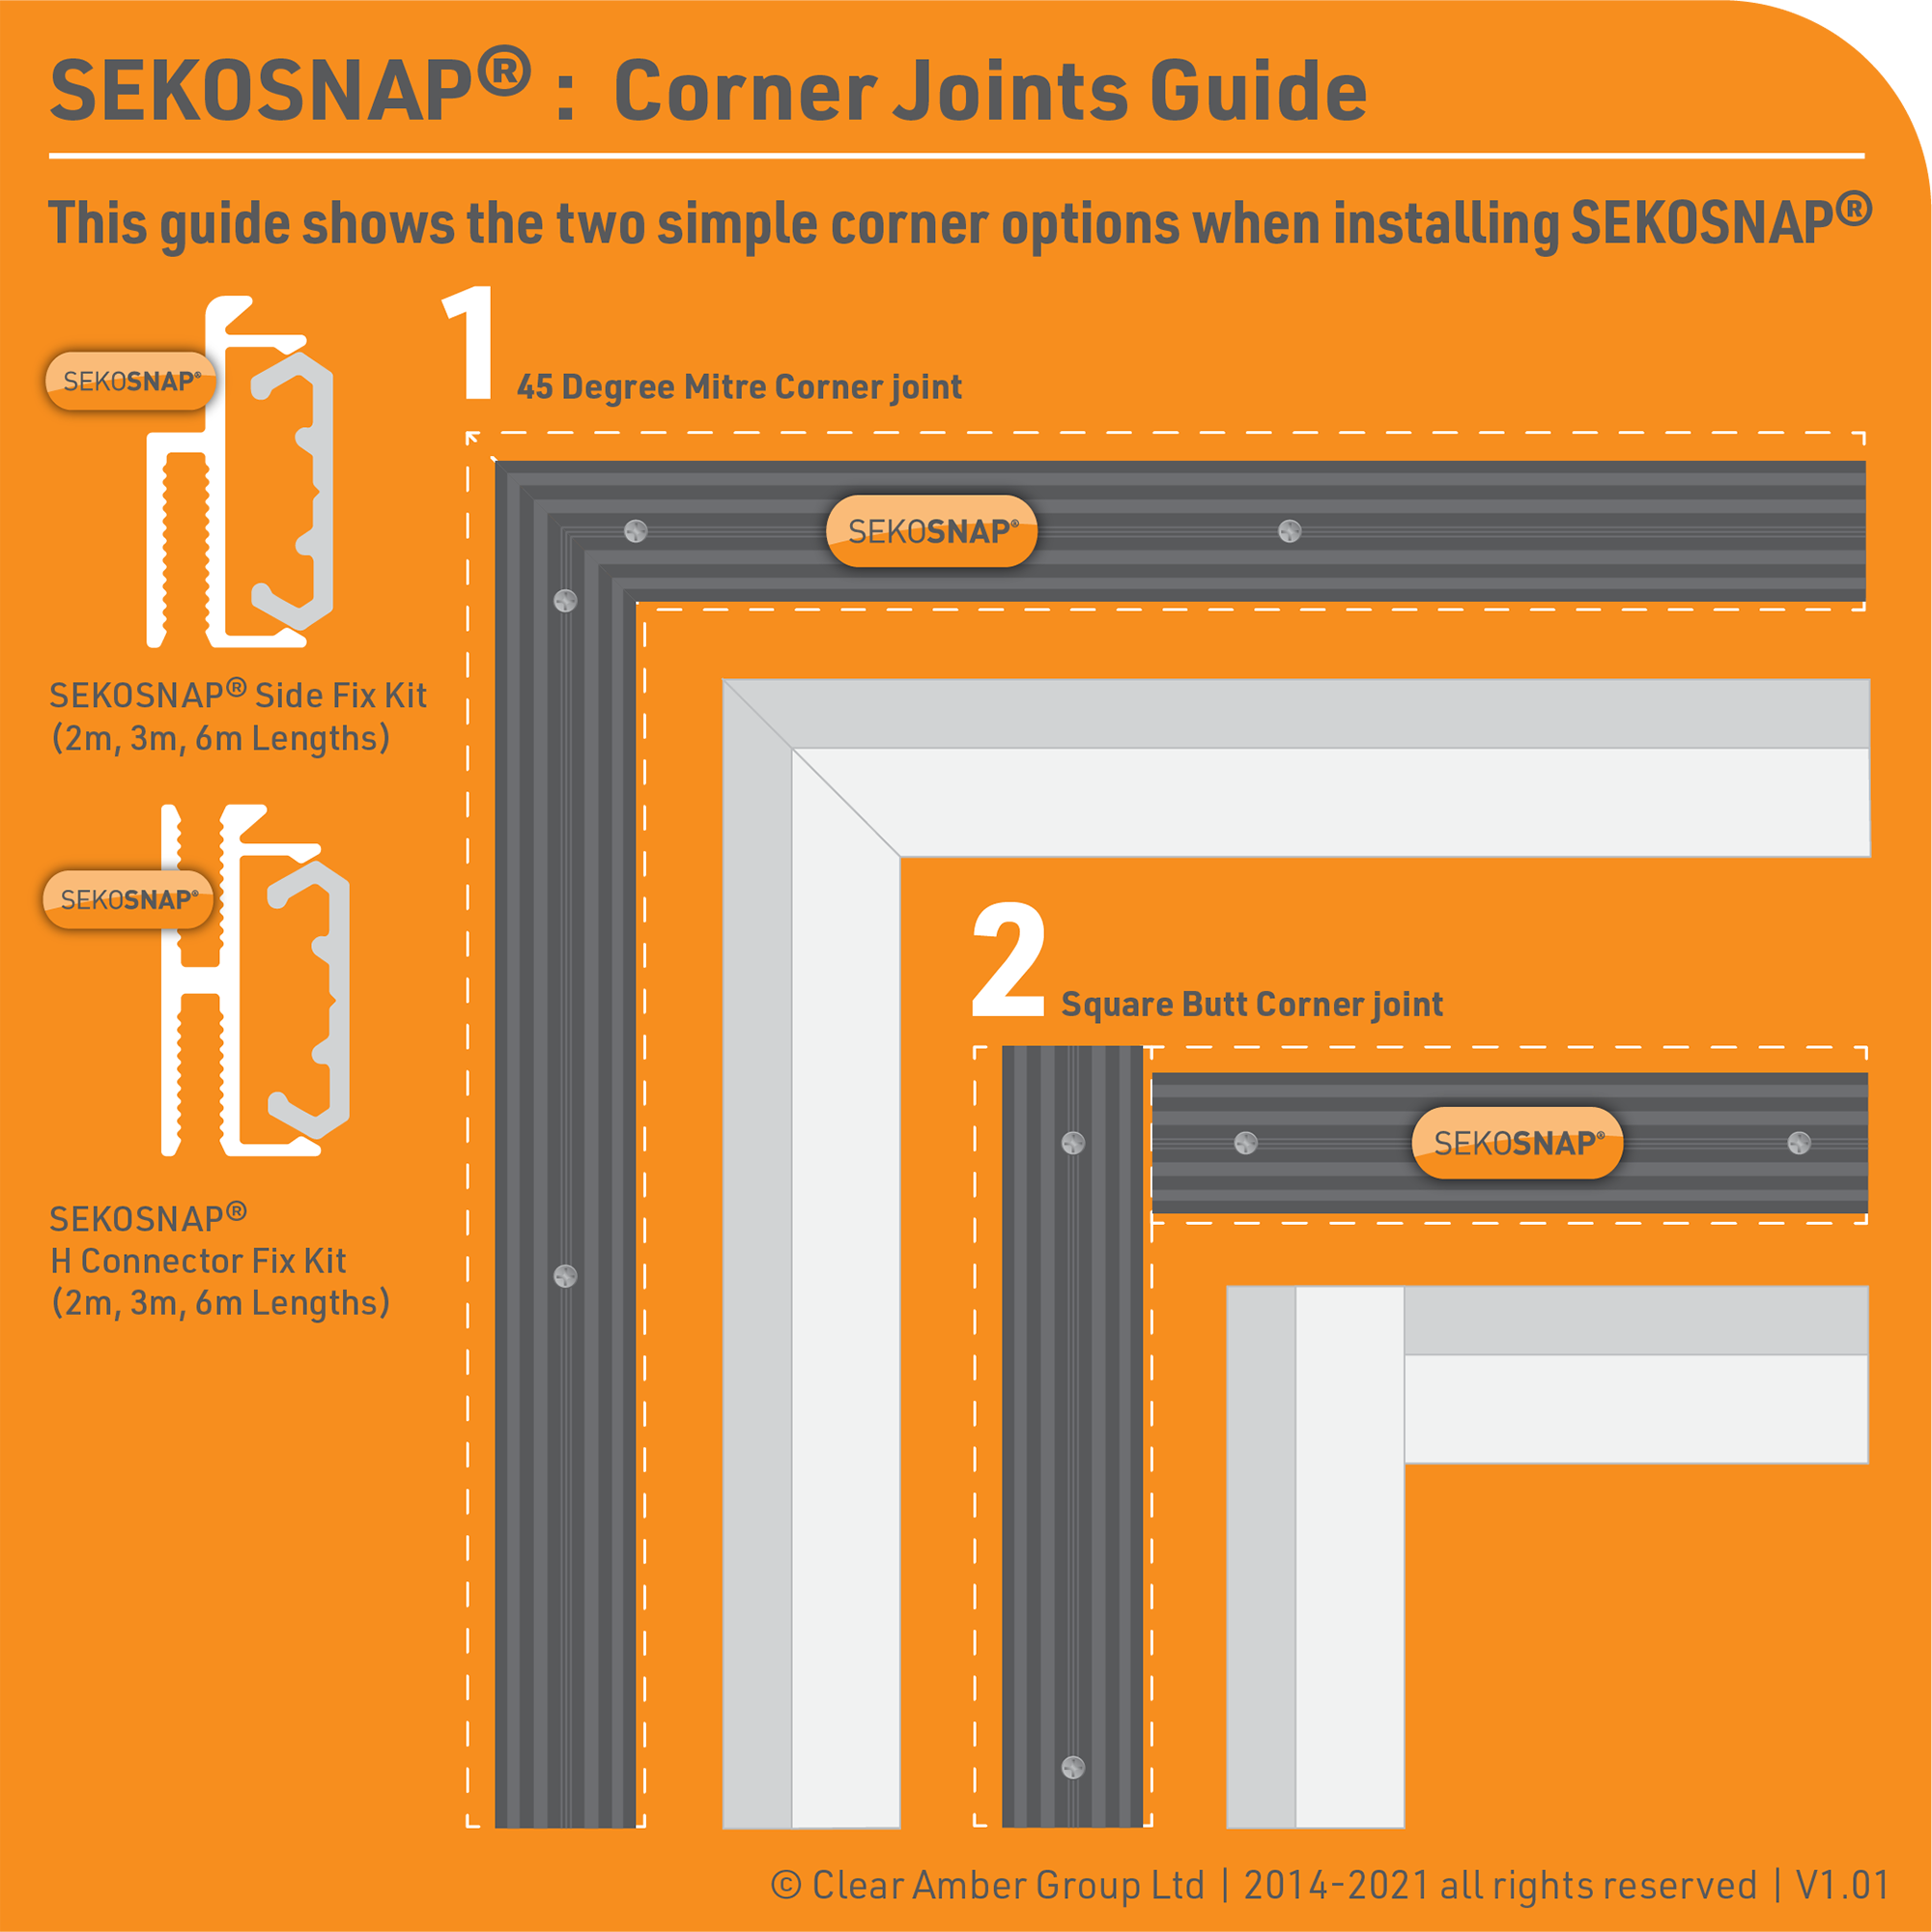
How is best to join the Sekosnap® bars at the corners?
How to join Sekosnap® bars at the corners is a great question because there are two different ways of doing this; a butt or mitre joint. Aesthetically it is sometimes thought that a mitre joint gives a more professional finish, however, a butt joint is often easier to do on installation so both are equally valid. Please see the infographic below which helps clearly illustrate the Sekosnap® Joint options.
What thicknesses of Axgard® Sheets are compatible with Sekosnap®?
The patented and registered design of Sekosnap® system allows it to be compatible with Axgard® glazing sheets of both 2 and 3mm thicknesses, with Axgard® 3m being recommended for most applications due to the extra strength and rigidity.
Can you remove the Sekosnap® once installed, if required?
One of Sekosnap®s best features is its ability to be rapidly removed if required by simply hooking the removal flange and pulling the top cap at an angle to release. This ensures you can easily remove your SekoSnap® system for window maintenance or to replace any panels if damaged.
Get in touch:
Download New SekoSnap® Brochure