If you are looking for a clear roofing option for a project at home or site then you won't find much better than polycarbonate sheets! With unrivalled strength, polycarbonate sheets are a cost-effective roofing solution that offers both performance and value for money.
Not only are multiwall and twinwall polycarbonate sheets lightweight and easy to handle but they also are easy to install. Tradesmen or Homeowners with a little DIY experience will have no problems installing a polycarbonate roof with polycarbonate glazing bars.
Due to their ease of installation, Axiome Polycarbonate sheets are popular in a wide range of roofing applications, being used on every from pergola roofing to pond covers and from shelter canopies to carports!
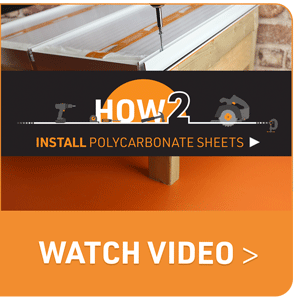
This 'How-to' guide explains how to install polycarbonate sheets using a plastic glazing bar system, Snapa. Using a snap-down glazing bar ensures the lowest upfront cost on a front however if you are looking for the best glazing bar option we would recommend our Alukap Aluminium glazing bar range.
If you are installing Axgard Solid Glazing Sheets or using our Alukap-XR Aluminium Glazing bars then please view our How to Install Glazing Bars Video.
Tools required:
- Appropriate PPE
- Drill
- Suitable Screws (Exterior Timber Screws if wooden rafters)
- Fine/medium tooth saw (Hack, circular or hand saw)
- Rubber Mallet
How to Install Polycarbonate Sheets with Snapa - Steps:
1. Safety first - wear the appropriate PPE equipment. When cutting the glazing bars to length it is advisable to wear safety glasses.
2. Make sure you have pre-installed your Endstop bar (or drip trim) to the end of your polycarbonate sheets before starting. Follow our How to Install End Stop Bar Guide to learn how this is done.
3. Measure the Snapa bar to make sure it is the correct length allowing for approx. 40mm overhang over your eaves at the gutter end.
4. If required, trim to length using a fine tooth saw. A hacksaw, circular saw or hand saw will all work well.
5. Optional - Predrill the base bars with pilot holes to make screwing down the glazing bars easier!
6. Place the first base bars on the top of your rafters, starting at one end of the roof. Top Tip: if you are starting with a wall bar make sure there is an approx. 9mm gap between the base bar and wall to allow for the top clip.
7. Allowing for an expansion gap of approximately 2mm between the polycarbonate sheets and Snap down glazing bars line the base bars up.
8. Choose screws that are suitable for your rafters. Consult a fixings expert or retailer if you are unsure. If you have timber rafters then standard exterior timber screws are commonly used.
9. Screw down the first two base bars starting with the outer rafter, a gable or a wall.
10. Screw the PVC glazing bars down at the top and bottom to hold them in place and then screw down 200-300mm intervals in between
11. Place the first Axiome polycarbonate sheet onto the roof
12. Peel back the protective sheet film back a little around the edge to give room for the glazing bar top caps to clip down
13. Place the Snapa top caps on top of the base bars to check the length and trim. The Endstop bar adds length to the sheeting so ensure the top cap is flush with the front edge of the Endstop bar. This allows the end cap to be screwed on later so is essential! The top cap will be approx. 7mm beyond the base bar.
14. Slowly push click the Snapa top cap down until you hear a “Click”, starting one end and working along
15. Use a rubber mallet to tap the polycarbonate glazing bar top cap fully into place. Do not use too much force when doing this to avoid splitting the top cap.
16. Using the small screw and cap provided, screw the Snapa Bar End Cap Onto the end of the glazing bar. If it is a pent or freestanding roof then use a Bar End Cap on both ends of the bar. Additional end caps will need to be purchased if covering both ends.
17. Snap the small cap into place!
18. For the outer rafters use a Gable Bar or Wall bar to finish! A gable bar is used for open sides to create a tidy finish and a Wall bar for wall sides to flash against the wall.
19. Finally, if it is a Lean-to roof, seal along the back with a Top Wall Flashing!
Related Polycarbonate Sheet Installation Instructions
When planning your polycarbonate installation it is worth also reading the installation guide of the glazing bar system you are using. Snap down glazing bars as shown in this guide tend to be the most commonly used and their step-by-step instruction guide can be found on the link below:
Snapa Snap Down Polycarbonate Glazing Bar Installation Guide
Although PVC Glazing bars have the lowest up-front cost the best glazing bars for polycarbonate are aluminium glazing bars which last longer and are more cost-effective. We manufacture both rafter-supported and self-support aluminium glazing bar ranges with our Alukap-XR and Alukap-SS systems, respectively. Please find the instruction guides for these ranges below:
Alukap-XR Aluminium Rafter Supported Glazing Bar Installation Guide
Alukap-SS Aluminium Self Supported Glazing Bar Installation Guide
If you have any questions regarding installing polycarbonate sheets or have a polycarbonate enquiry simply get in touch below and we’ll be glad to assist.
GET IN TOUCH
View our Axiome Polycarbonate Roofing Sheet Range
Read our Polycarbonate Sheet and Snapa Glazing Bar Installation Guide
Contact our team with an Axiome Polycarbonate Sheet project enquiry